
Included Mounting Kit:
1- Two Mounting Knuckles
2- Two Mounting Screws
3- Two Large Mounting Screws (For Larger Antler Trunk)
4- Two Set Screws

SMALL - MEDIUM ANTLER INSTALLMENT
WHAT YOU NEED: Drill with 5/32 and 7/64 Bit Sizes, Screwdriver, and Super Glue.
(Although 5 Minute Epoxy is recommended, it is not typically needed for smaller to medium size antlers. For Installment using 5-Minute Epoxy, See LARGE ANTLER INSTALLMENT, PAGE 3)


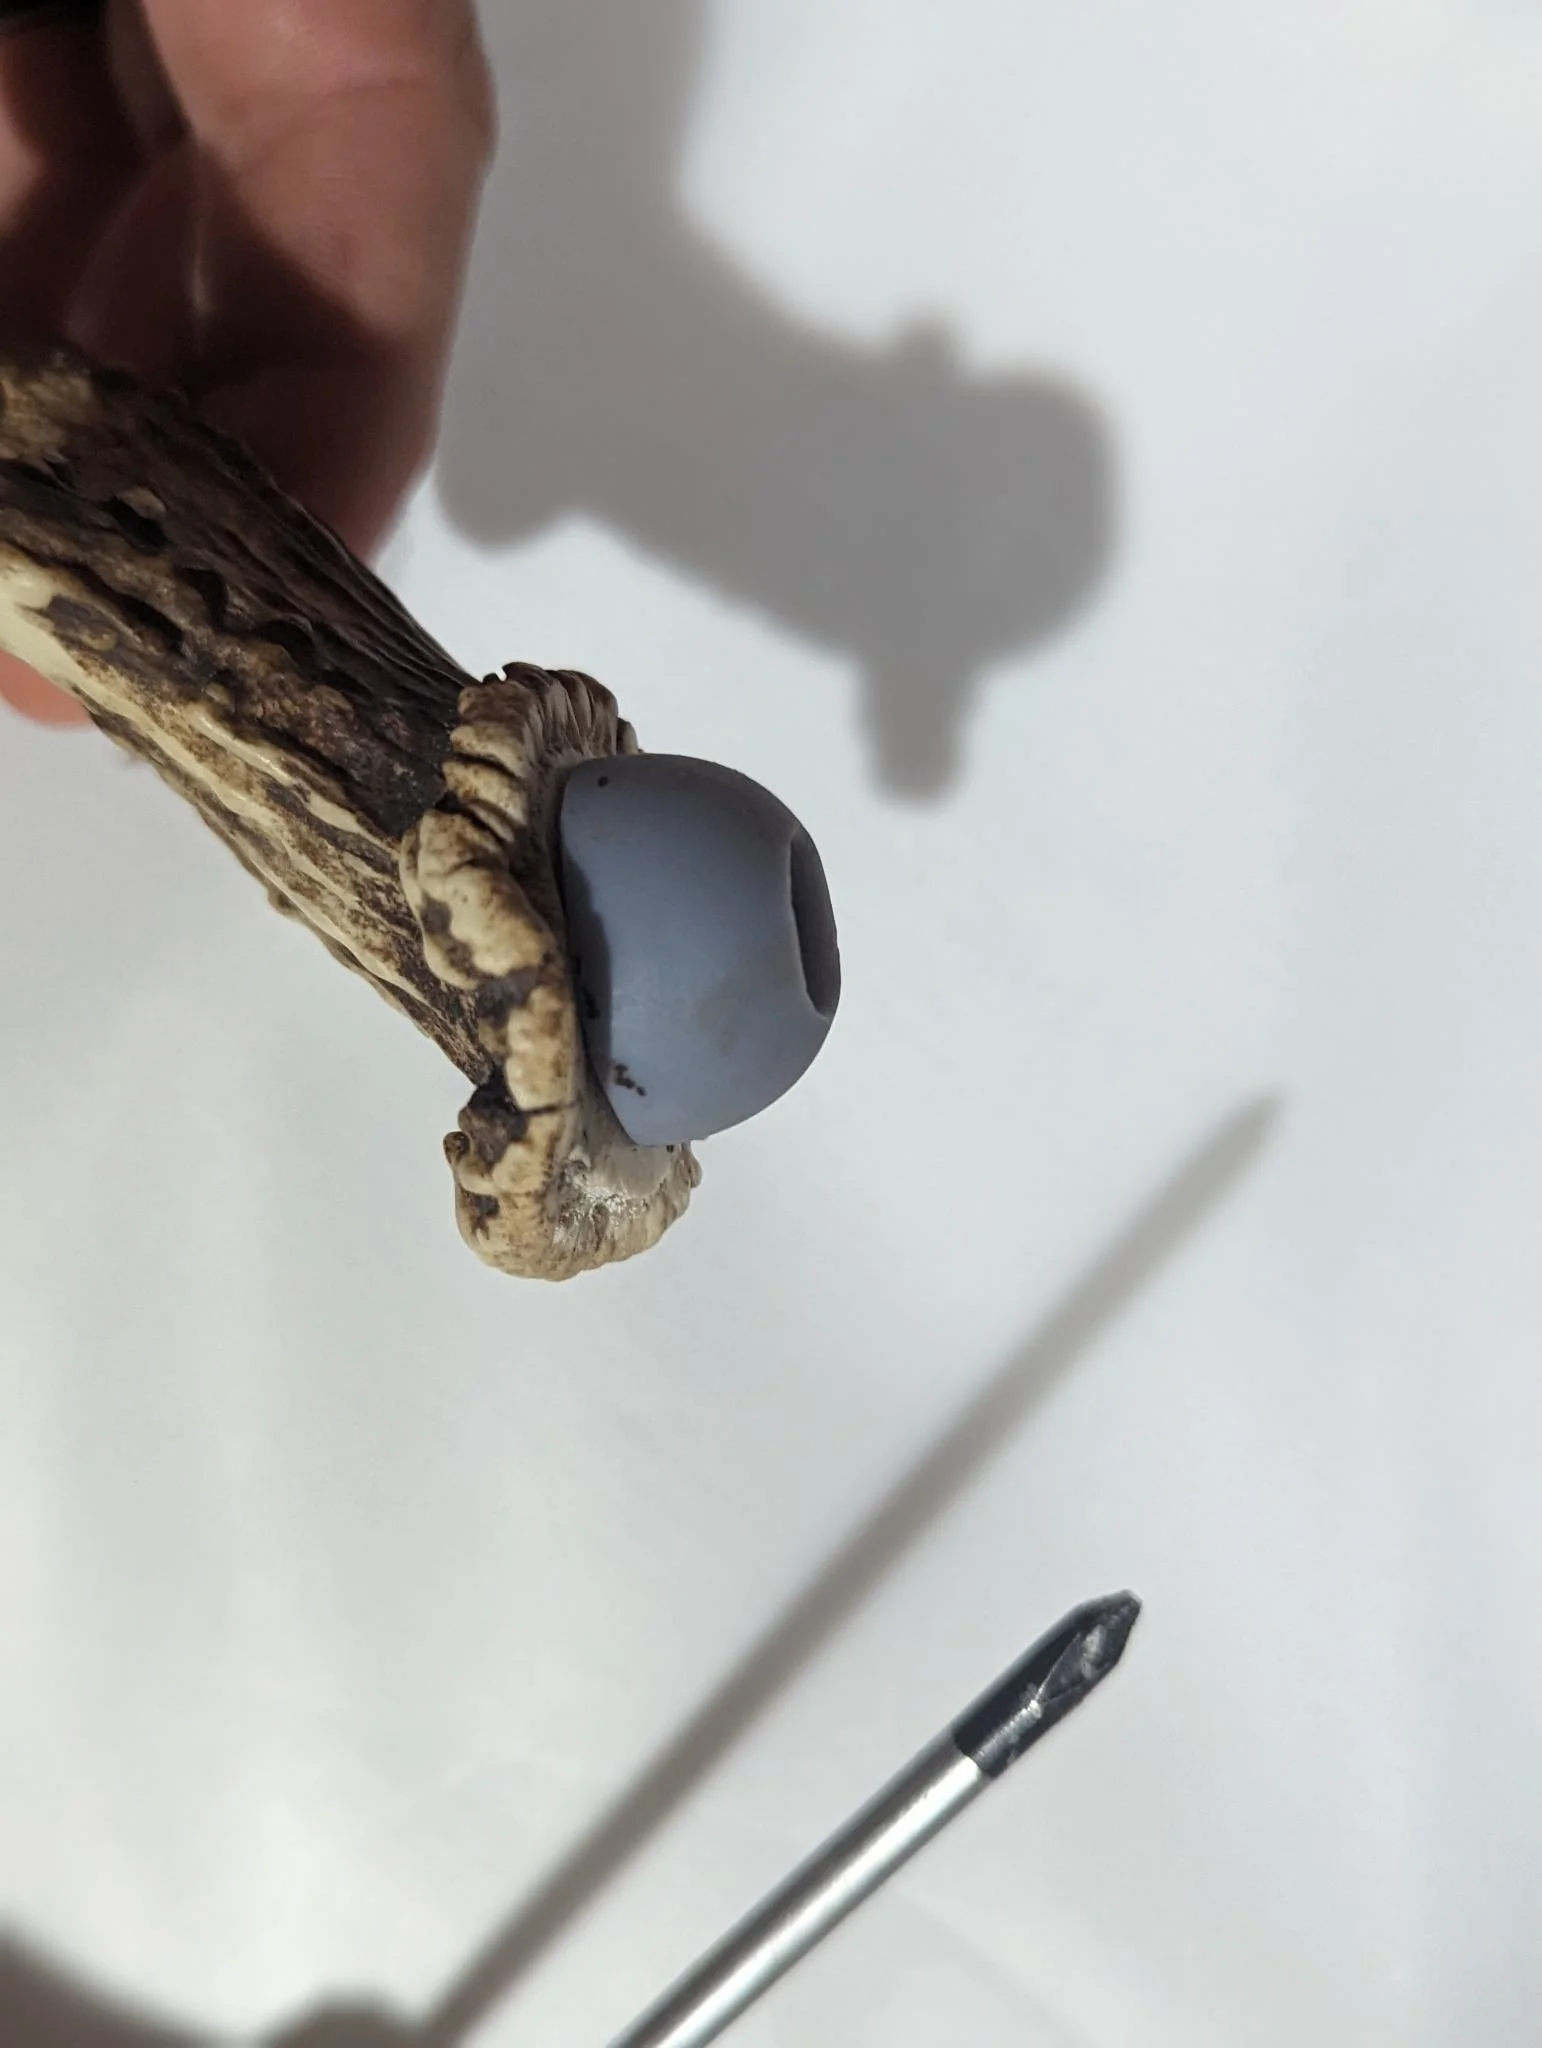
1. Using the 5/32 Bit, drill Straight into the middle of the bottom of your antler, not at an angle; Thus allowing the knuckle to sit flat against the bottom trunk of your antler. Repeat on the other antler.

2. Place your Mounting Screw into the Mounting Knuckle. Using your screwdriver, attach the Knuckle to your antler. Do Not over tighten the screw, however it should be snug. Repeat on the other antler. (If the trunk of the antler appears too thick/wide for the screw to support, use the Large Mounting Screws)


3. Run a test fitting by placing the Mounting Knuckle into the Socket Joint of the skull, and positioning the Antlers to your liking.


4. Once you have determined the position of your antlers, apply Super Glue to the socket and knuckle and hold in place until the glue has set long enough to hold in place alone. Let the Glue cure for at least 20 minutes before continuing.


5. Using your 7/64 Bit, Drill about ¼ inch straight into the skull and knuckle through the pre-drilled holes at the base of each Socket.

6. Using your screwdriver, screw the set screw into the hole. You will repeat this on the other antler.


LARGE ANTLER INSTALLMENT USING 5 - MINUTE EPOXY
WHAT YOU NEED: Drill with 5/32 and 7/64 Bit Sizes, Screwdriver, and 5-Min Epoxy
1. Using the 5/32 Bit, drill Straight into the middle of the bottom of your antler, not at an angle; Thus allowing the knuckle to sit flat against the bottom trunk of your antler. Repeat on the other antler.
2. Place your Mounting Screw into the Mounting Knuckle. Using your screwdriver, attach the Knuckle to your antler. Do Not over tighten the screw, however it should be snug. Repeat on the other antler. (If the trunk of the antler appears too thick/wide for the screw to support, use the Large Mounting Screws)
3. Run a test fitting by placing the Mounting Knuckle into the Socket Joint of the skull, and positioning the Antlers to your liking.
4. Once you have determined the position of your antlers use your 7/64 Bit to drill about ¼ inch straight into the skull and knuckle (while holding the antler in place) through the pre-drilled holes at the base of each Socket. (May need 2 people)
5. Apply your 5 Minute Epoxy to the socket and knuckle, and place the knuckle back into the socket.
6. With your screwdriver and set screw, secure the antler back into your chosen position. Repeat this for the other antler. 5-Minute Epoxy typical cure time is 1-2 hours.